Wednesday, October 23, 2013

Danish Pastry and Croissant Baking Workshop

I must admit that I'm a sucker for good deals. Today, there are just too many deal websites available. I am not sure if all are reliable but so far I have bought deals from Groupon, MyDeal, milkadeal, Livingsocial, and maybe a few others which I can't remember. But the above are my top deal websites which I normally browse and find good and interesting deals.
One time I bought a deal from Groupon for a danish pastry and croissant baking workshop. It was RM99. I went to the workshop on Saturday, 12 October 2013. The workshop was held at Millenium Square, PJ.

This was where the workshop was held. I arrived 15 minutes late because I couldn't find the place., or rather my GPS couldn't find the place. -___- And also because I had to stop at McDonald's to do my big business. -__- So I missed the first, most important part of the class, which is making the dough. Sigh such a waste.

Anyway, they gave us a sheet of paper with the recipe on it and they  also wrote it on the board so I didn't really lose much. It looks easy in writing but it is actually a tedious and quite a tiring process. We were also taught how to make the cream filling for the pastries. I didn't take pics because I was bust concentrating. Cewah.
The dough needs to be rested in the fridge after mixing. This is the part where the pastry fat or butter is added and kneaded. This is the hardest and most tiring part because you need to roll out the pastry to distribute the pastry fat or butter evenly. There is also the several folding methods to ensure that when the pastry is baked, you get the flakiness and layers of buttery goodness. Too much of kneading and rolling will cause the pastry to lose its layers.

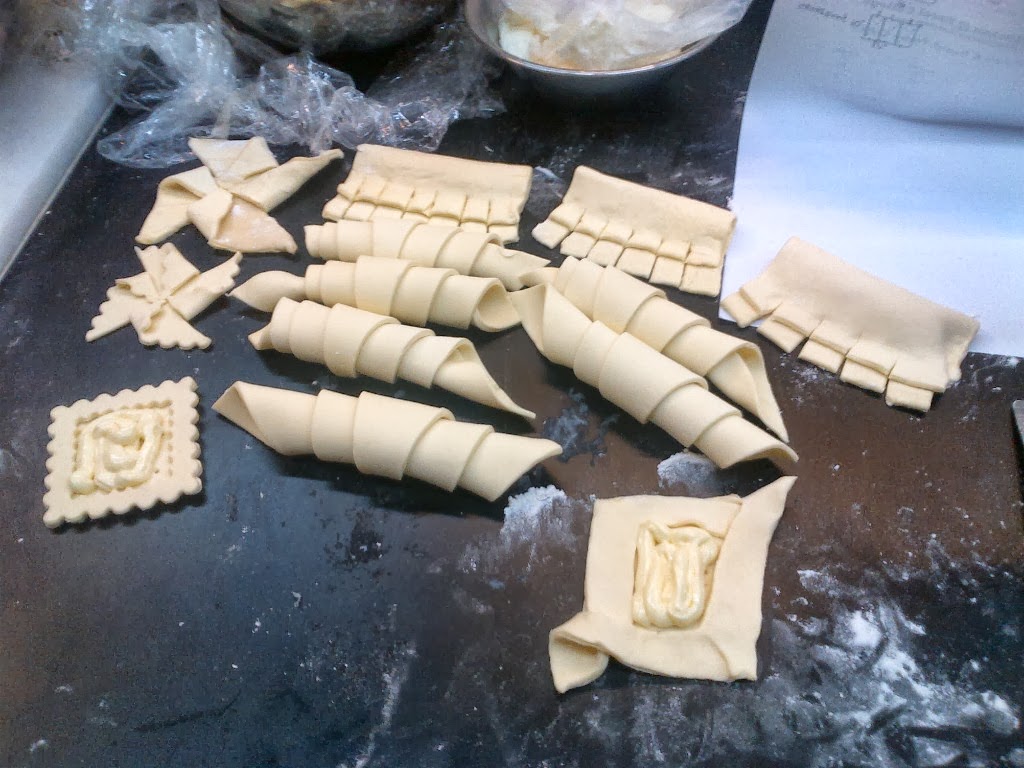
We were taught to shape the croissants, to make the pinwheel shape, diamond shape, bear paw shape and square shape. There is a certain measurement that you have to follow to get the right size. Told ya it's not easy! And I really don't like the measuring parts. We actually used a measuring tape and a ruler to get the exact measurements!

These are my pastries before baking. You can either put the fruits and cream before or after baking. I also brought some unbaked pastries home to bake the next day. You can make the dough and freeze them in the freezer for several months.

The girl in the black apron was our teacher that day. She was assisted by her sister. They're both very young and friendly girls. Obviously she knows what she's doing and we were in awe every time she demonstrated to us. There are a few couples attending the workshop as well, which I think is very sweet. Next time I might drag my hubby along but he said if it's a cooking class, he's all for it but for baking, no way. -__- So much for enthusiasm huh?
This is the second hardest part actually. Not the baking part but the waiting part! The whole room smells like a bakery and the smell was so good! By the time we finished baking, it was past 12pm and everybody was starting to feel hungry. Class started at 930am by the way.

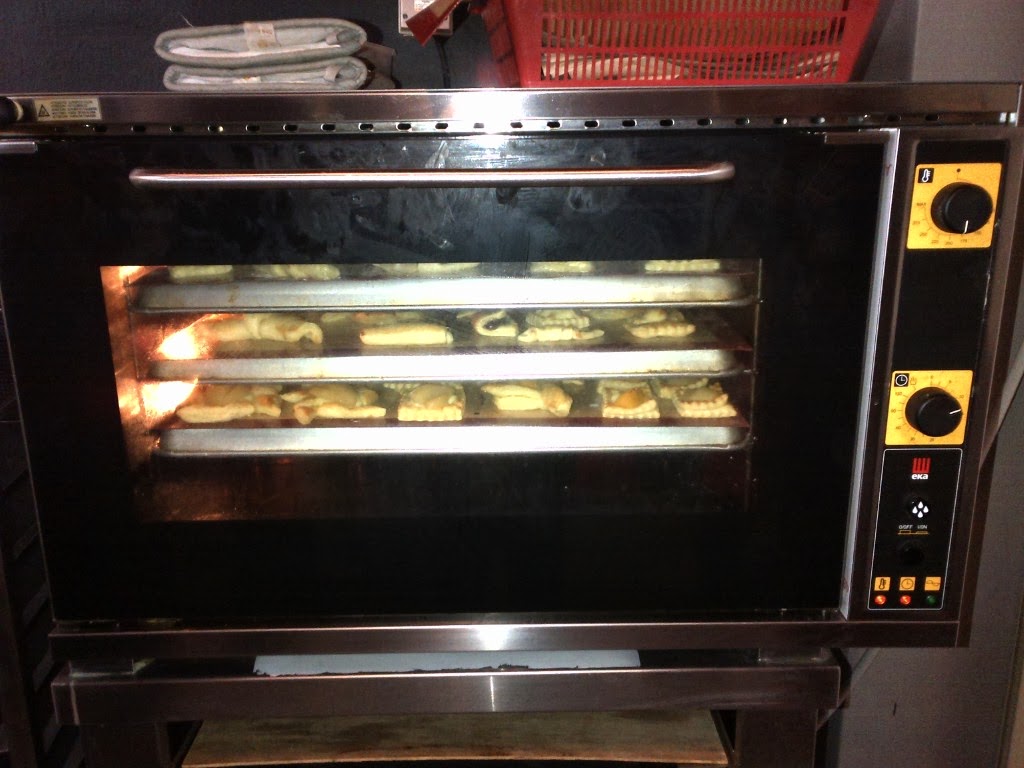
These were my baked goodies. Don't they look awesome and professional? Heh heh. Most importantly, hubby and Babycakes said sedapppppp! :) If you are too lazy to make the dough from scratch, fret not. You can just buy the frozen puff pastry in the supermarket and shape them as you please. I think I might just do that because it's just too much work! Now I know why a piece of danish pastry or croissant costs RM3 onwards! However if you make your own, you will use the finest ingredients like butter instead of pastry fat and you can use any and as much filling as you please.
Who knows, I might set up my own little cafe with cakes and pastries when I am done or bored with practicing as a lawyer. At least I have a back up, right? And it's something that I like to do. Next time I want to see if there are any bread or bun making workshops.
Checkout their fb at The Studio Kitchen if you are interested in joining their classes. They also offer a diploma course for 1 year at RM9999.

Tuesday, October 22, 2013

weekend project part 33

I was feeling a little ambitious and extra hardworking on Friday evening. I wanted to make a cake to bring to my aunt's house on Saturday afternoon. Instead of the normal butter cake or chocolate cake, I decided to give rainbow cake a try. I know it's just butter cake with food colouring. I got the recipe for butter cake from bestrecipes.com.au. http://www.bestrecipes.com.au/recipe/easy-mix-butter-cake-L497.html

Since I am making a rainbow cake, I doubled the measurements and I got quite a large batter. I then divided the batter into five because I have five food colourings i.e. red, orange, yellow, green and blue. I didn't have purple and I totally forgot that red+blue=purple.
Baking each colour takes about 15-18mins because the layer is thin. However since I don't have two baking tins of the exact same size, it takes quite a while because once one layer is done, I have to transfer it on a cooling rack, replace the baking sheet, pour the next batter and bake again. My oven isn't big enough to hold two tins at a time anyway. The baking part was really long. I let the cakes to cool down overnight and I put the baking sheet in between the layers so they don't stick. I then covered with a cling wrap. The next day, I asked hubby to buy butter to make the buttercream frosting.
Frosting the cake is quite a challenge for me. One, my icing is a bit too sweet. Two, the texture and consistency of my icing isn't smooth so I ended up with sort of a 'rustic' look on my cake, or so I would like to believe. While I was frosting my cake, hubby took Babycakes to swim in the pool so I get to work in peace because the previous night Babycakes keep peeping at my cake and said 'Nak! Nak!' and I know she was just too intrigued by the colours of the cake. I'll have to wait for her to be slightly bigger before I can get her involved in my baking projects or I'll end up with a very messy kitchen and toddler.

I sprinkled the top of the cake with colourful strands to give a hint that it's a rainbow cake. I brought it over to my aunt's house and I was just in awe when I cut the cake. Just look at how vibrant the colours turn out. I am amazed at myself! :) You can clearly see that the sizes of the layers are uneven and the frosting too is uneven but heck, it was my first time and I couldn't be more happier for myself. I need to learn how to make a nice frosting which is less sweet and easy to spread. Next time I must remember to make the colour purple.

Monday, October 21, 2013

All The Best, Baby Turtle!

One week before Babycakes' 2nd birthday, we went to Cherating on Sunday because hubby had some work in Paka on Monday. We could have gone on Saturday itself but sigh hubby had some work to do as well, so we can only go on Sunday. We vowed to leave house early on Sunday morning because we didn't want to reach Cherating very late and miss out on playing by the beach. Sp by 9 we were out of the house, stopped for breakfast along the way and by 1pm, we reached our hotel, Impiana Resort Cherating.
After freshening up, we went to the famous Hai Peng Kopitiam in Kemaman. It was scorching hot, the kopitiam was crowded but that didn't stop us from trying out their coffee. Honestly, to me it was just like any other coffee. They served iced coffee in plastic cups which is a bit put off considering that their interior decoration are all vintage and full of antiques. It also didn't help that Babycakes was throwing a tantrum, probably because of the heat. On the way back to the hotel, we bought some fried keropok lekor to eat in the room.

At about 5ish pm, all three of us head to the beach. We brought along Babycakes' beach toys, IKEA stacking cups, a small basket and a bucket. She had fun playing with sand, even though she hesitated to put her tiny feet on the sand at first.
As we were busy building a sand castle, a hotel staff came to us and asked if we wanted to release a baby turtle for RM10. The money will be used for their conservation. Of course we said yes! The staff then returned with a pink bucket containing a tiny baby turtle, which is the cutest little thing. Babycakes was in awe upon seeing the baby turtle.
We then slowly released the little creature and let Babycakes blow a goodbye kiss to the baby turtle. We did record a video but  it was filled with my annoying voice. -_-
She was 'geli' at first but we let her touch the shell of the baby turtle. We followed the baby turtle until it reached the sea.
The little guy slowly made its way to the sea. By following it closely, we also help to protect it from unsuspecting prey like birds. Some baby turtles didn't even make it to sea because half way through, a bird will catch them. Surely we don't want that to happen to our little guy, especially not in front of Babycakes!
The little guy was so determined to make its way to the sea. It's amazing how a tiny little creature, all alone can make its way to the sea just by following its instinct. Allah is great.
The baby turtle did get washed by the waves a few times but soon it disappeared right before our own eyes. It was such a bittersweet memory for us. We hope and pray that the little guy will survive in the big ocean. The hotel staff said that if it survives, 15 years later he will come back to the very same beach where he was first released. Maybe we will get to see him one day, Insyaallah. Good luck baby turtle!!

Friday, October 18, 2013

Do Not Order From apampolkadot.com.

Remember in my Party DIY post, I wanted to write about apam polkadot? So here is the story. In the preparation leading to Irene's birthday party, I already had in mind what desserts I would like to serve. I know there's gonna be a teddy bear cake. I also ordered a ballerina teddy jelly cake and a motorbike jelly cake for my dad. I also decided to order mini apam or famously known as apam polkadot. I submitted my query to them more than one month before the event date. Click on the pictures for a better view. These are all print screen from my emails, mostly from me to them. The emails say it all.


Btw, all conversations were in emails because according to their business policy, they do not publish their numbers because they do not accept orders or alterations by phone. Well if that is how they work, fine by me but if email is the only sort of communication, then by all means, check your emails and reply! I only got their number when they called me at 12pm on the event date itself. If I had ordered something else to replace the apams, wouldn't it be so inconvenient to get something at the very last minute?


Check out the time it was posted at the post office. No wonder it didn't reach me on Friday morning. Normally when I make online purchases, items delivered by poslaju will arrive before 11am. Never has it arrive after lunch because the vendors had posted the items before 12pm the previous day. Kalau benda dipos jam 8malam, memangla takkan sampai on time! I already told them it is an office address, office closes at 6pm, office closes on Saturdays. 
Until today, nobody from their side had sent an apology email, despite my numerous emails. They just couldn't be bothered. I did send a text to the admin and she replied that she was away for a course and she will get back to me. But she never did. That is why I decided to write this post so that my readers are aware and so that my readers can stay away from ordering from them, unless you dare take the risk. The apam reached my office on Monday morning but I had to go to Muar on Monday. When I opened it on Tuesday, they are already moldy. Guess where they ended up in?


Monday, October 14, 2013

Stamping Shapes With Homemade Paint

This is another fun and cheap activity for Babycakes I made recently. As usual, I made the paints myself. I made 4 colours; Green, Orange, Blue and Red. I just bought a yellow food colouring recently so the next time we shall have yellow as well.

First, gather your materials. 
  • cardboard- I used  cereal boxes and cake boxes and the backing of a packaging
  • shapes- I asked Babycakes to collect all her shapes and put it in a bucket
  • paint- mix flour, water, salt and food colouring
  • your budding little artist
  • an apron or bib
  • a work desk covered in newspaper
 
I poured the paints in Styrofoam square plates, the ones you get from buying fish etc at the supermarket. You can't use an egg carton or a small container for this project because your artist needs to dip the shapes in the paint. Make sure you have the right consistency of the paint too so that the colour doesn't mix. Alternatively, put in separate plates but that will take so much space, unless you are doing it on the floor.


I demonstrated to Babycakes on how to do the stamping. Don't forget to pose and take pictures too and have fun while you're at it. Eventually the colours will mix and her hands will get dirty but that is the whole idea. Let the kid have fun and explore the texture of the paint, learn colours and shapes, let her see what happens when the colours are mixed and also let her imagination run wild.


I let out her artwork to dry in the balcony while I cleaned her up. This is the end product.

Friday, October 11, 2013

Cinnamon Twists for tea, anyone?

I have so many things bottled up inside me but I just can't write it here. Sigh. How I wish I could....
Anyway, bad mood and negative vibes aside, nothing else can cheer me up like Babycakes did. Indeed it is true that a child is the most precious gift from Allah swt. Even though she drives me up the wall on a daily basis, she is the one who always puts a smile on my face.
Babycakes was having fever for the past 2 days but I had a trial in Shah Alam on Tuesday and Wednesday that I couldn't take leave. I felt so bad for her. Even though her fever was not that high but I won't know if she is well rested at the nursery. So yesterday I took an emergency leave and stayed home with her for her to recover. In the evening, I made cinnamon twists for tea and ate them with nutella. I got the recipe from this site. I have a packet of puff pastry in the freezer so while Babycakes was napping, I went to the kitchen.  I don't have chocolate chips so I just used a mixture of brown sugar and cinnamon for the filling. I spread some nutella on them before eating.
I know, they're not the prettiest cinnamon twists you have ever seen but the taste was great! You can add chopped nuts if you like. I don't have any in my pantry.

Babycakes just woke up from her nap and we devoured the home made cinnamon twists. Give it a try. It is really easy, I kid you not.

Monday, October 07, 2013

Juztshop 8GB Minion Thumb Drive Giveaway

Being a contest junkie, my motto is simple. 'Selagi ada contest, masuk je. Kalau ada rezeki, menang. Takde rezeki, cuba contest lain." I don't like fb contests which requires public voting because it is so hard to get votes. All I can do is campaign or at least ask people to vote but I can only ask so many times because people will get annoyed and bored. I prefer a contest where the organizers do the decision making rather than the public. But then again, it is their marketing strategy to promote their pages because you are first required to like their page before you can actually cast a vote. Some people find it tedious, which I truly understand.
That is why I like to enter contests which don't require voting. All I need to do is enter the contest and hope and pray that luck will be on my side and it is my rezeki to win. No matter how big or small the prize is, I would just give it a try.
Recently, Juztshop held a giveaway on their fb page. All you have to do is register on their website, like their fb page and comment on the photo with the comment 'I want the 8GB Minion Thumb Drive' or something like that, I can't remember. I could really use a bigger storage thumb drive and a minion thumb drive makes it sound more appealing. So I went and registered and liked the page and commented on the photo. Not long after, they announced the winners. 

 Alhamdulillah, rezeki. ^_^

I gave my particulars and then this lil guy came in the mail. Thank you Juztshop! Go check out their website if you are looking for gadgets and stuffs.

*this is not a sponsored post. I am merely sharing my win.
 

Thursday, October 03, 2013

Party DIYs

We had Babycakes' 2nd birthday party last Saturday, 28 September 2013 at Don's Warung, Plaza Damas. I decided that her birthday theme this year would be abik (teddy bear), since she is so fond of abiks. Besides, it is easy to pull off. I didn't want to spend (or rather waste) so much money on the decorations because at the end of the day, it will all be thrown out. I searched the internet for ideas and I managed to do the decorations all by myself (and a bit of help from hubby of course).

The birthday banner was made using cut up Styrofoam plates in the shapes of a abik's head. I got the template online. I cut the shape on a paper, then trace on the plates. I then cut the plates enough to for the words HAPPY BIRTHDAY. At first I wanted to cut colored papers for the letters but I had some brown paper so I cut the brown papers and pasted on the plates to give the effect of brown abik. I then printed the words HAPPY BIRTHDAY from this site. Hubby helped punch the holes and thread the string onto the plates. As for Irene's name, I bought the letters from Balloon Buzz at RM1.50 per piece. These letters can be kept for future use. As for the abik's heads, the same  can be used if you're having a Mickey Mouse themed party. I had the staff of the restaurant help me hang the banner on the wall.

I found 4 small abik coin boxes at Foto Zzoom shop near my office some time ago. They were having a clearance sale and selling each coin box for RM7 with 50% discount. I asked the cashier if I take all 4, will I get further discount? She agreed to sell each coin box for RM3. Initially I wanted to fill them with m&m or skittles or smarties but when I look again, even though they are small, I need a lot of m&m. m&m aren't really cheap so I bought Fruit Plus and stuffed them inside the box. Four lucky guests got to bring home those coin box and enjoy the sweets. Since we are having the party somewhere else, we need to transport the goods and materials and it won't be easy to carry a huge, heavy glass cake stand. I have my huge Zalora boxes so I wrapped one in abik wrapping paper and voila, instant cake stand that not only is light but also suits the theme.
What is a party without marshmallows, right? I searched online and stumbled upon Marshmallow Amana. They sell certified halal marshmallows at a very reasonable price. Once I saw at Giant, the abik marshmallows were selling at RM5.90 per 100g and the abiks were all flat and ugly. I bought 600g from Marshmallow Amana and I packed 6 pieces of marshmallows in small clear plastic bags, which was the leftover plastic bags from last year's birthday party. Earlier I cut abiks from a wrapping paper and I stapled it to the bag. If I had ordered a custom made header, it will cost me a lot and wouldn't it break your heart to see the beautiful headers in the dustbin? People will just rip it off and throw it away anyway.

I was on Pinterest and stumbled upon this awesome idea for a pinata. If you go to party shops, go and check the price of the pinatas and tell me if your eyeballs don't pop out. I saw a unicorn pinata for RM79.90! Yes it's super cute but for that price? I'll pass. I decided to make a number 2 pinata but it's not for whacking. Instead, it is used as a decoration on the dessert table. You can make your own pinata too. I started doing it bit by bit since August. This is the link where I got the idea from. Brilliant, isn't it?  The pink and purple crepe papers were also from last year's party. I made a layer of paper mache on the pinata because I want it to be hard and sturdy because it is not for whacking, remember? 

   
I was looking for an easy and cheap idea to make place cards for the stuffs that will be put on the dessert table. I tried making an easel out of popsicle sticks but they are too flimsy and they risk falling apart when I transport them to the venue. I found this adorable abik fan at Living Cabin for RM4.90 (if I recall correctly). I separated the abiks and cut some colored papers, had hubby write the names of the items, decorated with some glitter abik confetti and stick them on the fan. I then used play doh  to stick them and put them on the table.

I also printed pictures of abiks (you can find tons of images online) and put some color pencils and crayons for the kids to color. This kept the kids occupied or they'll get bored. The wooden letters of Babycakes' initials (IDR) were bought in Sydney Airport just before boarding home. I never thought of her birthday party by then but since it's abik-themed and it has koalas on it, it suits perfectly. Again, I used some play doh to make the letters stand. I also colored and printed a picture of an abik with a birthday cake with a number 2 candle on it, cut it out and frame it in a glass frame I bought at Daiso. The 'welcome sign' was also designed and printed online. When you go to parties or weddings, there are photo props which are adorable. We didn't have a photobooth but we did have some abik masks as photo props. I simply printed them online, pasted them on recycled cardboards (I used a biscuit box and a cereal box) to make them sturdy. Cutting the holes for the abiks' eyes is the hardest part. I took 2 old balloon sticks which were lying around the house, cut them into two and pasted them on the masks. One more mask is an orange abik.

I wanted the guests to leave a small note or wish for Babycakes. Earlier this year I bought a deal from one of the deal sites for small photocards. I thought of doing a scrap book for Babycakes but instead I used the photos for the guest book instead. Instead of the normal guest book, I had guests choose a photo, which I've pasted double sided tapes on the back. I bought a packet of coloured origami papers and some abik stickers from Daiso and some glitter glue. I wrote an instruction as to how to leave the wish. I bought small wooden clothes pegs from this site. I put a string on the table for guests to hang their notes.The table cloth, RM4.90 was from Tokutokuya, also a Japanese shop similar to Daiso.
A few months back, I ordered 150pcs mini bar chocolate from Chocolat Wrapper. The design is as per above. I also ordered some mini apams but there's a story behind it, which requires a separate entry on its own.

So there you go. I was happy to see how the decorations turn out and most importantly, I made them from scratch, all by myself and with lots of love. It is so satisfying to know you did it all by yourself.